{article.name}

Taylor Rental of Berea, OH
Create a Stone Walkway
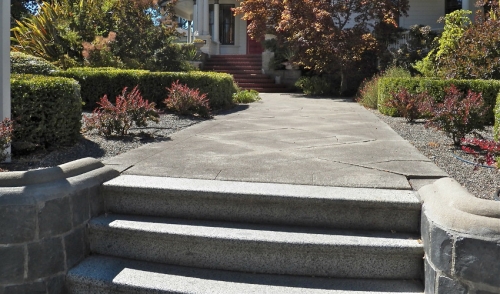
Transform an ordinary walkway or patch of lawn into a unique stone walkway that will be the envy of your neighbors. This project should take you just a day or a weekend to complete. Make sure to stop by your local rental store for a few special tools you will need.
Materials:
- Crushed limestone
- Sand
- Paving stones
- Edge restraint
- 6-foot 2"x4"
- 10" landscape spikes
Tools:
- Plate compactor (rental item)
- Cut-off saw (rental item)
- Level
- Spade
- Square-nose shovel
- Cutting spade
- Hard-tines rake
- Hacksaw with a fresh blade
- Wheelbarrow
- Trowel
- Hand tamper
- Plate tamper
- Brick-set chisel
- Mason's line
- Stone splitter
- Sledgehammer
- Hose and spray nozzle
- Rock or mason's hammer
- Angle cutter with diamond blade
Step 1. Prepare the area.
After you have checked that there are no utilities underground, you can begin to dig. Remember to leave room for the base as well as the stones so the walkway will be at the same height. The depth of the trench will need to accommodate a 4" limestone base, the 1" sand base, and the thickness of the stone. Don't forget to figure in proper drainage away from the house. For every foot away from the foundation, the hole should slope down 1/4". Make sure that the trench is 8 to 10 inches wider than the new stones, since it will need to accommodate the base layer and the edge restraint.
Step 2. Build the Base.
Lay down 2" of crushed limestone and spread it out over the area with a rake to make it smooth. This is important to do because it factors into the sturdiness of the path. The limestone can be dampened to aid in compacting. Compact the sub-grade with a plate compactor to create a good base. Pull the compactor over the area several times to make the surface harder and smoother. Use a hand tamper where a plate tamper could not reach. Lay another 2" of crushed limestone and go through the same process as previously described. Check the surface for level with a 6' 2"x4" and fill in where needed with any extra limestone. Once level, run the plate compactor over the surface once again.
Step 3. Install Edge Restraint.
Use spray paint to mark the edge of the walkway. Make sure that the restraint is at least 8" away from the edge of the base. Using the marks to line up the restraint, secure it with a landscape spike in each hole. On edges that curve, you can use flexed edge restraints. You can overlap the restraints to make a stronger connection. If need be, cut the restraints with a hacksaw to fit your specifications.
Step 4. Lay the Stones.
Sand will level out the under side of the stones where high and low spots remain. Pour sand over the base and smooth it out on the section that you are going to begin working on. Consider the natural shapes of the stones to determine which will fit best in an area. Then begin to lay stones near the house and along the edging, making sure they sit level. When laying stones near a doorway, make sure the stone is below the threshold. If a stone wobbles, remove a little bit of the sand and set it back in place. After the first stone is laid, place other stones around it at the same level. Use a mason's hammer to chip away excess for custom-cut stones. For large cuts that need to be made, use a cut-off saw to score the excess and then use brick set chisel and hammer to chip off the piece.
Step 5. Lock Stones in Place.
Create a mix of 8-parts sand and 1-part dry cement to set the stones permanently in place. Spread the mixture between the stones and dampen the walkway. Once the mixture is applied to the surface, place a board over the stones to prevent cracking and go over it once more with the plate compactor.
Comments